Four easy wood-stacking methods, real-life photo references, where to place your red-and-white Embers Fire Starter, and practical tips for lighting a fire with confidence.
Every great fire needs dry wood, space for airflow, and a reliable starting point. In the diagrams below, the red-and-white sphere shows where to place an authentic Embers Fire Starter. Each Embers starter is designed to burn for approximately 6–8 minutes.
LOOK FOR THE RED-AND-WHITE EMBERS STARTER IN EACH DIAGRAM
RED + WHITE = EMBERS STARTER PLACEMENT
REAL-WORLD EXAMPLE: TEEPEE STACK · Photo: Skilled Survivor, CC BY-SA 4.0. Starter position is shown in the diagram above.
METHOD 01
Teepee Fire
BEST FOR: Outdoor fire pits and campfires
Place an Embers starter on the fire-safe base.
Arrange small, dry kindling in a loose teepee around it, leaving a clear lighting opening.
Light the starter as directed on the package. Add larger pieces gradually after the kindling catches.
Illustration is schematic, not to scale. Always use the fire starter according to its packaging instructions.
RED + WHITE = EMBERS STARTER PLACEMENT
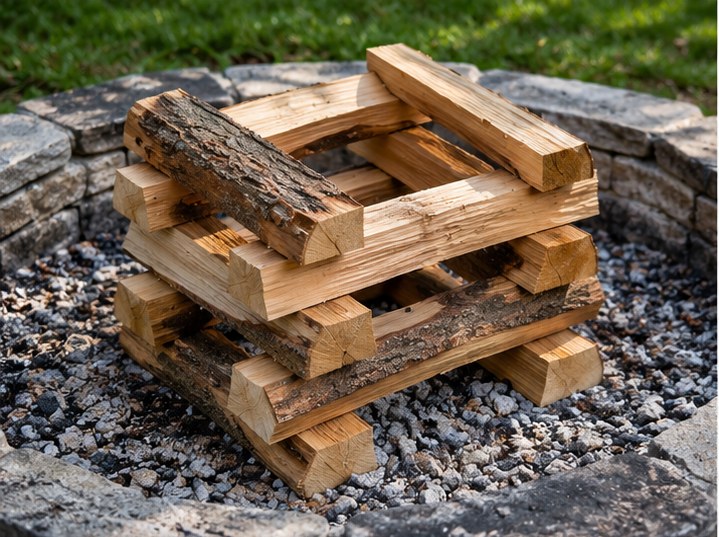
REALISTIC WOOD-STACK EXAMPLE · Illustrative visualization. See the diagram above for Embers starter placement.
METHOD 02
Log Cabin Fire
BEST FOR: Outdoor fire pits and campfires
Build a low square of split wood, alternating the direction of each layer and leaving air gaps.
Place an Embers starter at the center of the bottom opening, with small kindling above it.
Light through the open side; add larger logs only when the structure is burning steadily.
Illustration is schematic, not to scale. Always use the fire starter according to its packaging instructions.
RED + WHITE = EMBERS STARTER PLACEMENT
REALISTIC WOOD-STACK EXAMPLE · Illustrative visualization. See the diagram above for Embers starter placement.
METHOD 03
Upside-Down Fire
BEST FOR: Compatible fireplaces and wood stoves
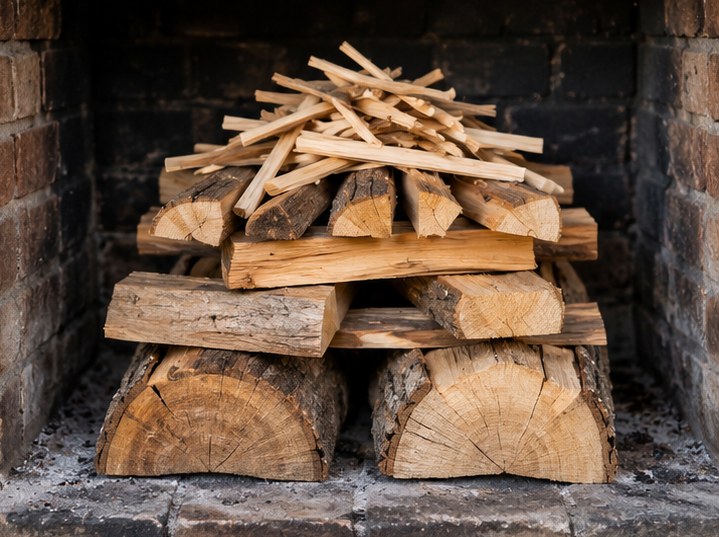
Lay larger split logs in a stable base, with progressively smaller wood and dry kindling on top.
Place an Embers starter on the top layer beside the kindling, fully accessible for lighting.
Light from the top as directed. Follow your fireplace or stove manufacturer’s approved lighting method.
Illustration is schematic, not to scale. Always use the fire starter according to its packaging instructions.
RED + WHITE = EMBERS STARTER PLACEMENT
REALISTIC WOOD-STACK EXAMPLE · Illustrative visualization. See the diagram above for Embers starter placement.
METHOD 04
Lean-To Fire
BEST FOR: Outdoor fire pits and campfires
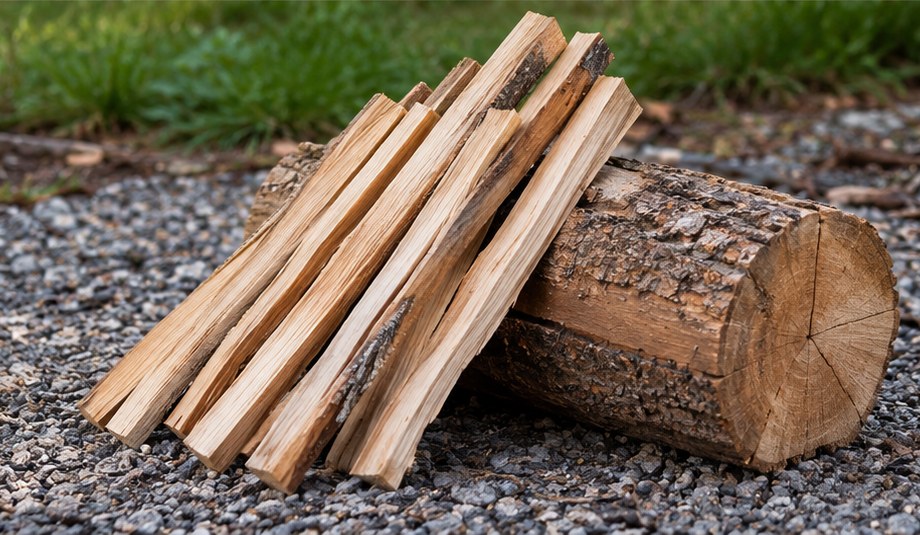
Place a larger support log on a stable, fire-safe base.
Set an Embers starter next to the support log, then lean dry kindling above it with a gap for airflow.
Light the starter through the open side; add larger wood after the kindling catches.
Illustration is schematic, not to scale. Always use the fire starter according to its packaging instructions.
WHY CHOOSE EMBERS?
A MORE CONVENIENT WAY TO START THE FIRE.
Embers Fire Starters are a compact, ready-to-use alternative to gathering loose paper or using lighter fluid. Their solid, spherical format is designed for simple placement beneath or among kindling.
LESS LOOSE MATERIAL
No need to stuff the fire with loose paper or newspaper, which can create floating burning scraps and ash.
NO POURING LIGHTER FLUID
Use a ready-to-light starter instead of pouring liquid accelerants into your fire setup. Never add lighter fluid to an active fire.
ONE-PIECE PLACEMENT
The compact ball format makes it easy to position a starter before lighting, without handling a pile of loose tinder.
STEADIER STARTING WINDOW
Designed for approximately 6–8 minutes of burn time to help kindling catch. Actual performance varies with fuel and conditions.
Important: No fire starter is spark-free, ash-free, flare-up-proof, or risk-free. Wood fires themselves can produce sparks, ash and sudden flame changes. We have not independently verified comparative safety claims about burns, sparking or disintegration. Never hold or move a lit starter, never add starter material to an active fire, and always follow product instructions.
FIRE-BUILDING PRO TIPS
Choose dry, seasoned wood and appropriately sized kindling.
Leave gaps between logs so oxygen can reach the flame.
Start with smaller pieces, then build up to larger logs.
Keep children and pets away from fire-building and ignition areas.
For indoor fires, confirm that the fireplace or stove and flue are ready, and use only manufacturer-approved fuel and lighting methods.
For outdoor fires, follow local burn restrictions and fully extinguish the fire before leaving.